It’s been a long time coming, but years of wishing I finally got my old Canon converted to IR. The old EOS 20D had serious back focusing problems, Canon refused to service it and since these models did not come with focus micro-adjust capability of any kind, the only option I had left was to send it to a third-party shop. That’s where I had realized that the amount it would take to have it serviced would not be much less than a conversion, which includes focus calibration. I decided to opt for the 590nm super color filter, which provides superb flexibility and with some PP allows to mimic the other filters.
The folks at LifePixel did an excellent job, calibrated the camera to my own Canon 50m f/1.8 lens, and their proprietary Super Color filter does wonders. Of course, it is the middle of winter here and apart from frozen grass there is no greenery nearby for me to do proper test shots. I’ll have to wait until the spring, but even in winter, IR is an excellent choice for black and white photography. I took the camera for a spin around downtown Chicago using a Rokinon 16mm f/2.0 fully manual lens, which I found for cheap on eBay.
Most of the pictures were shot at f/8 focused on precise infinity and looked very sharp all the way into corners. I did test pictures focused past infinity and the best I can tell, there is not much difference in sharpness. Several test shots @ f/2.0 were surprisingly sharp as well, but not that well suited for street and landscape photography because of shallow DOF. This photo was taken in the middle of winter around noon with sun and lots of clouds.
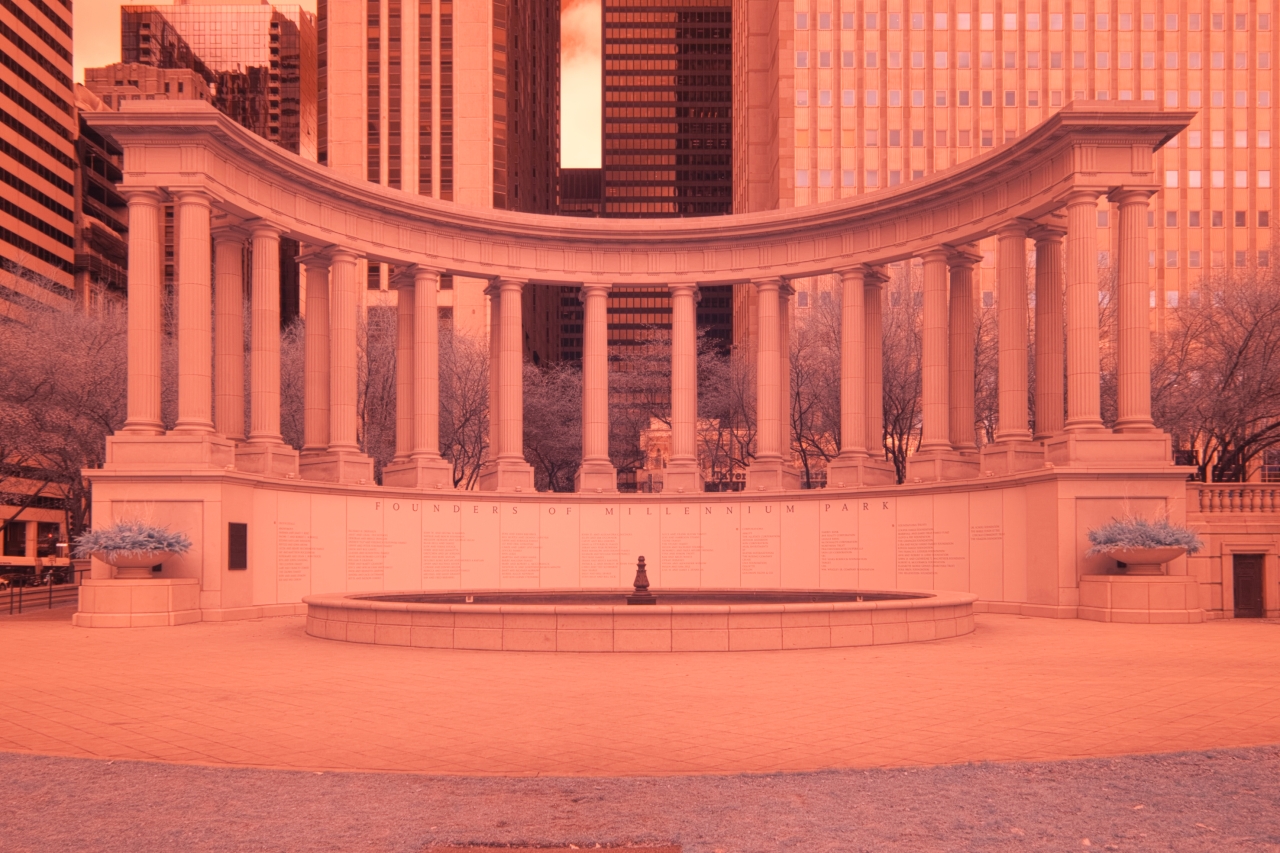
This was my first time ever shooting IR, so it will take some time to get the routine down without forgetting important basics. I white balanced the camera on patches of grass as I walked by and as the sunlight changed. The pics came out a lurid shade of salmon pink due to lack of direct sun and no grey card on hand, but I did not care as I knew I was going to convert it to B&W. On a different day, when the sky was clear, the camera took perfectly white-balanced pictures with yellowish white grass and tobacco colored sky, just as you’d expect from this filter. The only surprise for me was that the 20D metered about one full f-stop lower, so I had to increase exposure compensation by that amount to get well exposed shots. This is where having a fast lens becomes crucial when shooting hand-held, so you still maintain fast shutter speeds without boosting ISO too much. Especially with this old camera, anything above eight hundred is useless for large prints.
Here is how the picture came straight out of the camera with lens correction applied:
This is how it looked after conversion to B&W in Luminar:
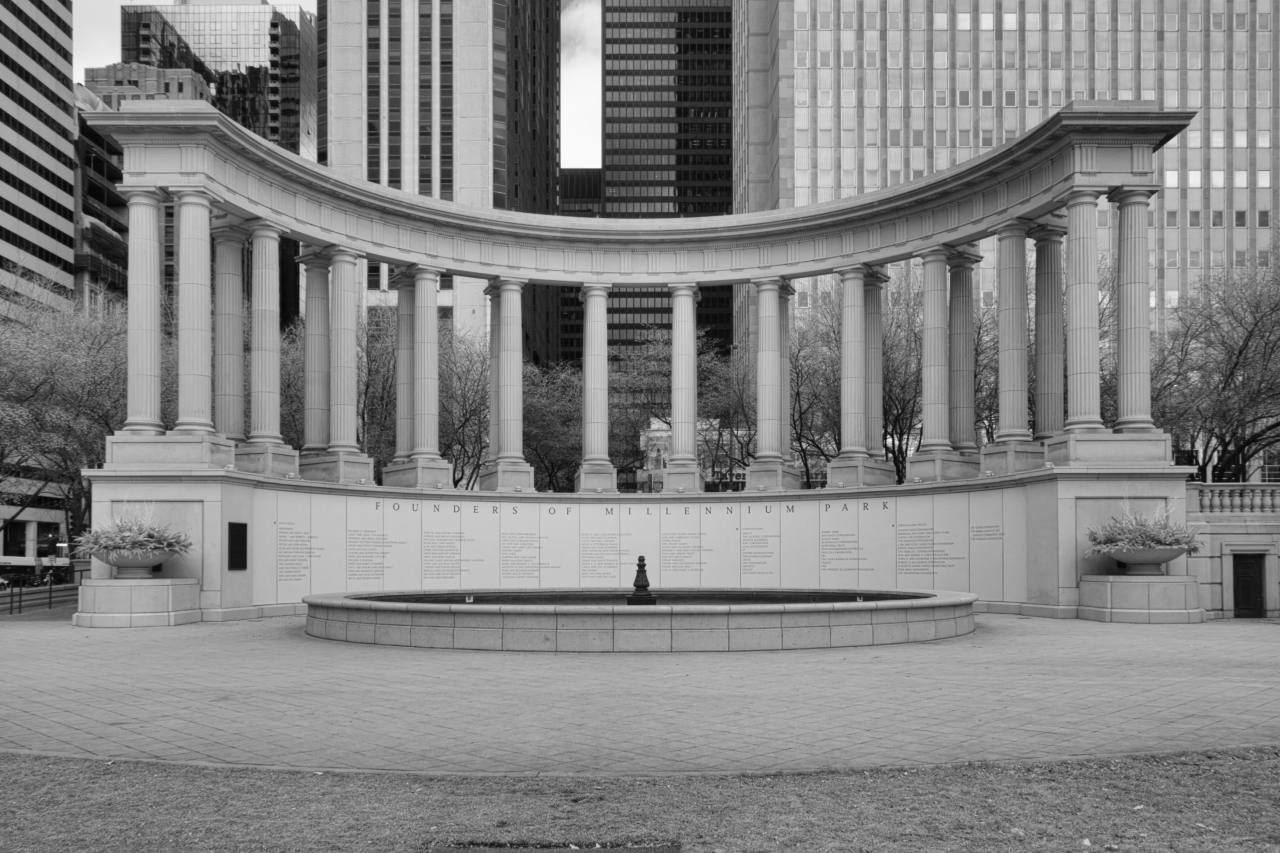
The above B&W image has no filters applied apart from B&W conversion and has not been tone mapped, showing awesome sharpness at 100% crop, despite coming out of an 8MP camera. It’s cropped, because I had to transform it to compensate for vertical skew, which is typical for wide lenses when shooting tall structures. The detail in the photo is staggering to me. There was no red/blue channel swap done in this case.
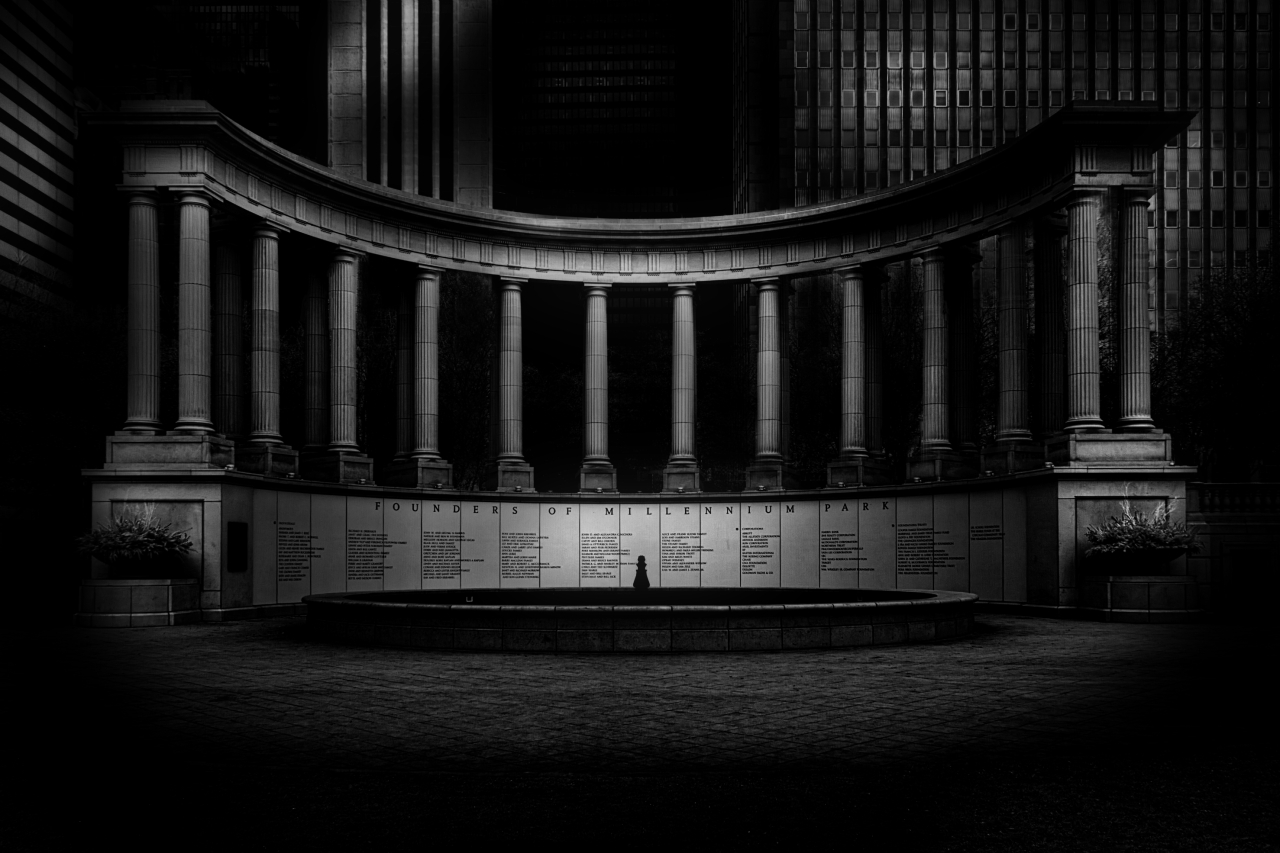
Here is the final picture after about 6 hours of playing around in Luminar, creating half a dozen or so versions. This monument is located at Wrigley Square of Chicago’s Millennium Park. It is a replica of an original monument, which had stood at this place since the beginning of the 1900s, built in ancient Greek Doric architectural style with 40-foot tall, fluted columns made of limestone.
Luminar app is so intuitive and easy to use. It really gets one’s creative juices flowing, and I must have created five or six different versions of the file before discarding the rest and keeping this one. This app is fun to use, and the learning curve is not as steep as with other tools. If you are getting serious about photography and Lightroom or other software intimidates you, this app would be a perfect reason to make the leap without fear and frustration. All it is lacking is a picture browser/catalog functionality (DAM), which is coming later in 2018 as a free update.
I loaded this picture with lots of filters (many of them very subtle), such as advanced contrast, soft glow, Orton effect, soft focus, and went heavy-handed on dodge and burn brush, aiming for dark, ominous mood of the picture. Mission accomplished. The guys at LifePixel put a breath of new life into my old broken camera and its second life is about to be whole lot more fun than the first one. I can already tell.


You actually make it appear really easy with your presentation but I find this topic to be actually one thing that I believe I would by no means understand. It seems too complicated and very extensive for me. I am looking forward on your next publish, I will try to get the grasp of it!
LikeLike
Thank you for the tip! Let me see, if I can try to break it down into sections in another article. I did not preserve the Luminar file, so I won’t be able to recreate it again precisely, but will try to recall all the steps it took me, what I did and where. Excellent idea!
LikeLike