I have wanted to write this for a really long time. It’s been nearly a decade, because that’s how long I’ve been shooting IR. In the beginning, I wanted to write this for myself as a set of instructions. I was still learning. I was trying to navigate the various quirks of shooting light you can’t see. I couldn’t always remember all the steps necessary for post processing. Oddly, the more I was shooting and learning more tricks and techniques, the less I was thinking about it. Writing this into a single set of instructions became less frequent in my thoughts. There was so much ground to cover. The things I knew at any given time kept changing constantly. I thought there was no point in writing them down anymore. By the time I’d be done, I’d need to start re-writing them, to include new discoveries. So, here we are, a decade later. I’m still learning, yes, but there is now experience I can share with any of you who are thinking of giving IR a go. As a disclaimer, I fully admit that I am not a professional photographer, rather a mere enthusiast and a hobbyist.
So, what is IR light?
Energy moves in waves of specific frequency. That frequency can be either measured in Hertz (Hz), as for how many oscillation cycles per second that wave makes, or in wavelength, as for how far the wave travels before it completes one oscillation cycle, measured in meters and their fractions. So, for example you may be listening to your favorite local station on your FM car stereo and tune to 98.7 MHz, which is the frequency of that signal (oscillating 98.7 million times per second), but that wave’s distance traveled between start of the cycle and its end will be over 3 meters, measured in wavelength.
If you like listening to AM radio, those frequencies are in kHz and their wavelengths can easily exceed 100 meters.
If you have an atomic time capable clock at home, it likely receives a signal at 60kHz from Fort Collins, CO (if you live in North America). That wavelength is over 470 meters!
If the frequency of the waves speeds up, you end up in microwave and wi-fi spectrum – that’s why having a microwave next to your router is not such a good idea and interference may occur. You speed up even more and end up in infrared spectrum with far and near field infrared and once you wavelength shortens somewhere between 380 and 750 nanometers (on the extreme ends), your eyes start perceiving it as visible light. When you go even farther in shortening the wavelength and raising the frequency, you end up in ultraviolet, X-rays, radioactive gamma rays and cosmic radiation bands overall.

Based on the infographic above, you can see that the IR light is to the left of visible spectrum and has longer wavelength than visible spectrum. This is important to know for shooting IR!
Also note the correlation between IR and specific colors and their distance from each other. This fact plays a pivotal role in deciding what kind of IR filter to use, what results we may expect from it and how to turn this to our advantage. I’m specifically talking about red and yellow spectrum being close to IR band, while greens, blues and purples being far from IR. I’ll get back to that later.
We also have to clear one thing up from the start. We will be covering near field IR photography only. There are several types of infrared spectrum, each serves a different purpose and they are not interchangeable:
Near Field IR – that is what infrared photography uses
Short IR – used in telecommunications
Mid IR – used in heat seeking missiles for targeting
Long IR – used in thermal imaging
Far Field IR – Starlink satellites “talk” to each other via IR lasers
OK, now that we’ve covered some basics, there is one more point I wanted to get out front and that is wave transmission (energy). You already know that AM radio waves travel farther than FM radio waves – their signal is not as pristine (AM radio sound notoriously tinny), but travel far, whereas FM waves can carry a pristine stereo signal, but are hard to receive hundreds of miles away. Same with your mobile phone – you may have great speeds on 5Ghz, but the range is shorter and all but useless inside concrete buildings while 2.4 GHz older signals may not have the speed of 5G, but can travel way farther and penetrate obstacles 5G signals can’t. The difference in energy here is important to remember, because it will play a crucial role in the way IR light focuses. I’ll write a completely separate post on this topic, because focus (or lack of focus) is one of stumbling blocks you will encounter when starting in IR photography.
Alright, now let’s talk near field IR!
Back in the day of analog film cameras, some manufacturers used to produce IR film, which was not sensitive to most of visible light, but was very sensitive to IR. I’ve tried it only once in my life with disappointing results. So disappointing that I didn’t even keep the original negatives. You see, IR film, however gorgeous it may seem, has odd quirks – it is far more sensitive to radiation than regular film – so keeping it in a protective thermally shielded case was a must – before and after exposing it. Second, IR film by design did not have anti halation layer in it’s emulsion. If you look at a structure of a film negative, you you have the cellulose or polyester carrier base and on one side of it several layers of chemicals are poured onto the carrier using laminar flow. These are for example color-specific silver halide layers, couplers, protective layers, anti halation layer, etc… This emulsion is then dried by air, cut up, rolled and canned. All of this obviously happens in total darkness.
With IR film the anti halation layer had to be removed, because it’s main purpose in regular film was to protect it from IR light. Regular film without an anti-halation layer would have this glow (some call it bloom) where any highlight areas would have this radiant aura of haziness around them. This is especially apparent when you have pictures of something chrome plated and the sun is reflecting off of it, causing a noticeable light haze around the object. In regular photography, that is undesirable (hence the anti halation layer), but in IR, it is absolutely unavoidable, because the anti halation layer cannot be used.
So, this is where IR film photography got its very distinctive look from. Hazy, radiant, blooming pictures with lots of glow and “fuzziness” and giving them this distinct dreamy look.
Nowadays, in the digital age, things are different and IR has become much more accessible. But, it comes with cost. And the cost being the knowledge how an IR shot should actually look. Digital cameras coming from the factory have an IR/UV blocking filter in front of the sensor (you may have heard of it as “hot mirror”) whose purpose is to let in only visible light. So, in order to shoot IR, you have two choices:
1. add an IR filter in front of the lens
2. rip out the hot mirror and replace it with IR filter (conversion)
I’ll write a post dedicated to using screw mount filters vs. camera conversions, but for now, let’s just say that each has its advantages and limitations and you need to decide what your boundaries are.
So what is IR light then?
All visible light is reflected light. If we put aside the likes of Long IR used in thermal imaging, which measures emitted light, the light our camera sensors can “see” is reflected light. Mainly reflected from the sun.
Quirk 1 – Fabrics
And this is where the unpredictability of IR stems from and the origin of never ending creativity. You simply can’t tell 100% what the shot will look like until you take it. Yes, you learn with experience what to expect, but there are surprises every single day. Especially with fabrics and clothes. Those are like Pandora’s box.
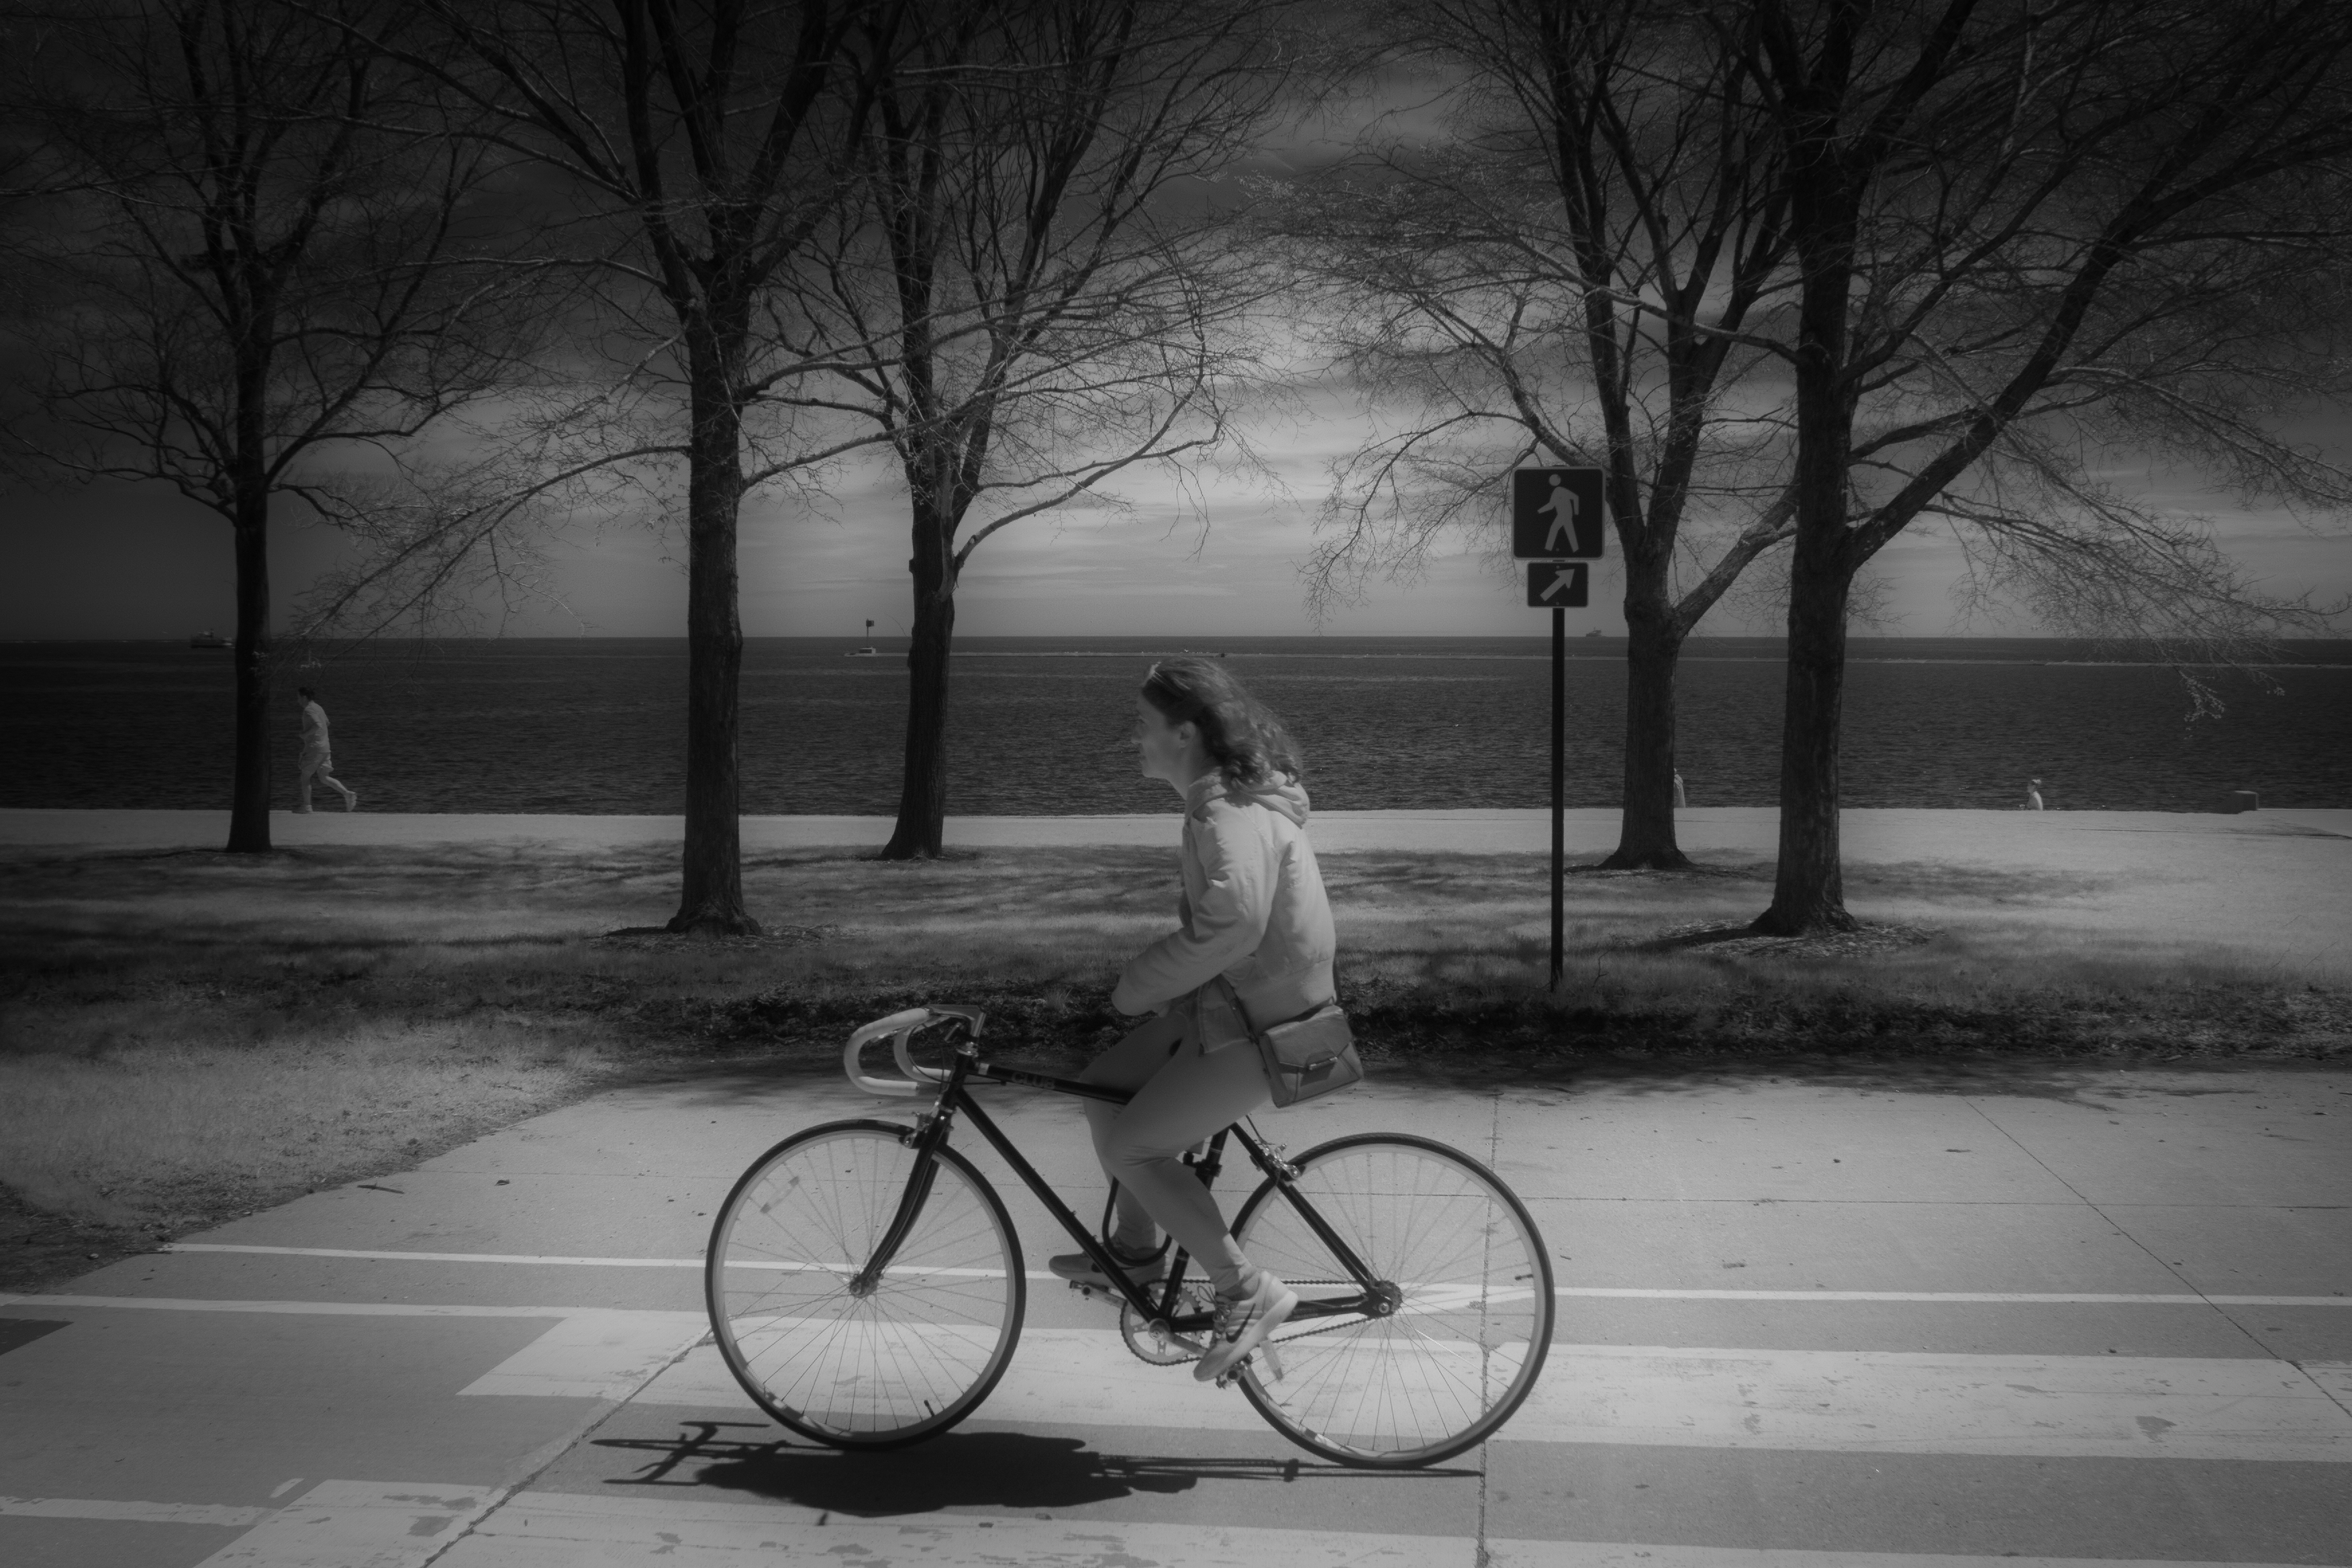
Notice in the IR picture above how the jacket is lighter than her jeans, which were light shade of blue. The jacket was black with grey stripes on the sleeves and the back. Here, the IR light reflected only a lighter color than her pants and the stripes are not visible at all! The IR reflectivity heavily depends not only on the material of the fabric, but also on the dye, direction of the sun, etc… WYSIWYG rule does NOT apply here. What You See Is NOT What You Get. You simply don’t know what you will get till you press than shutter button.
Quirk 2 – Grass and Leaves
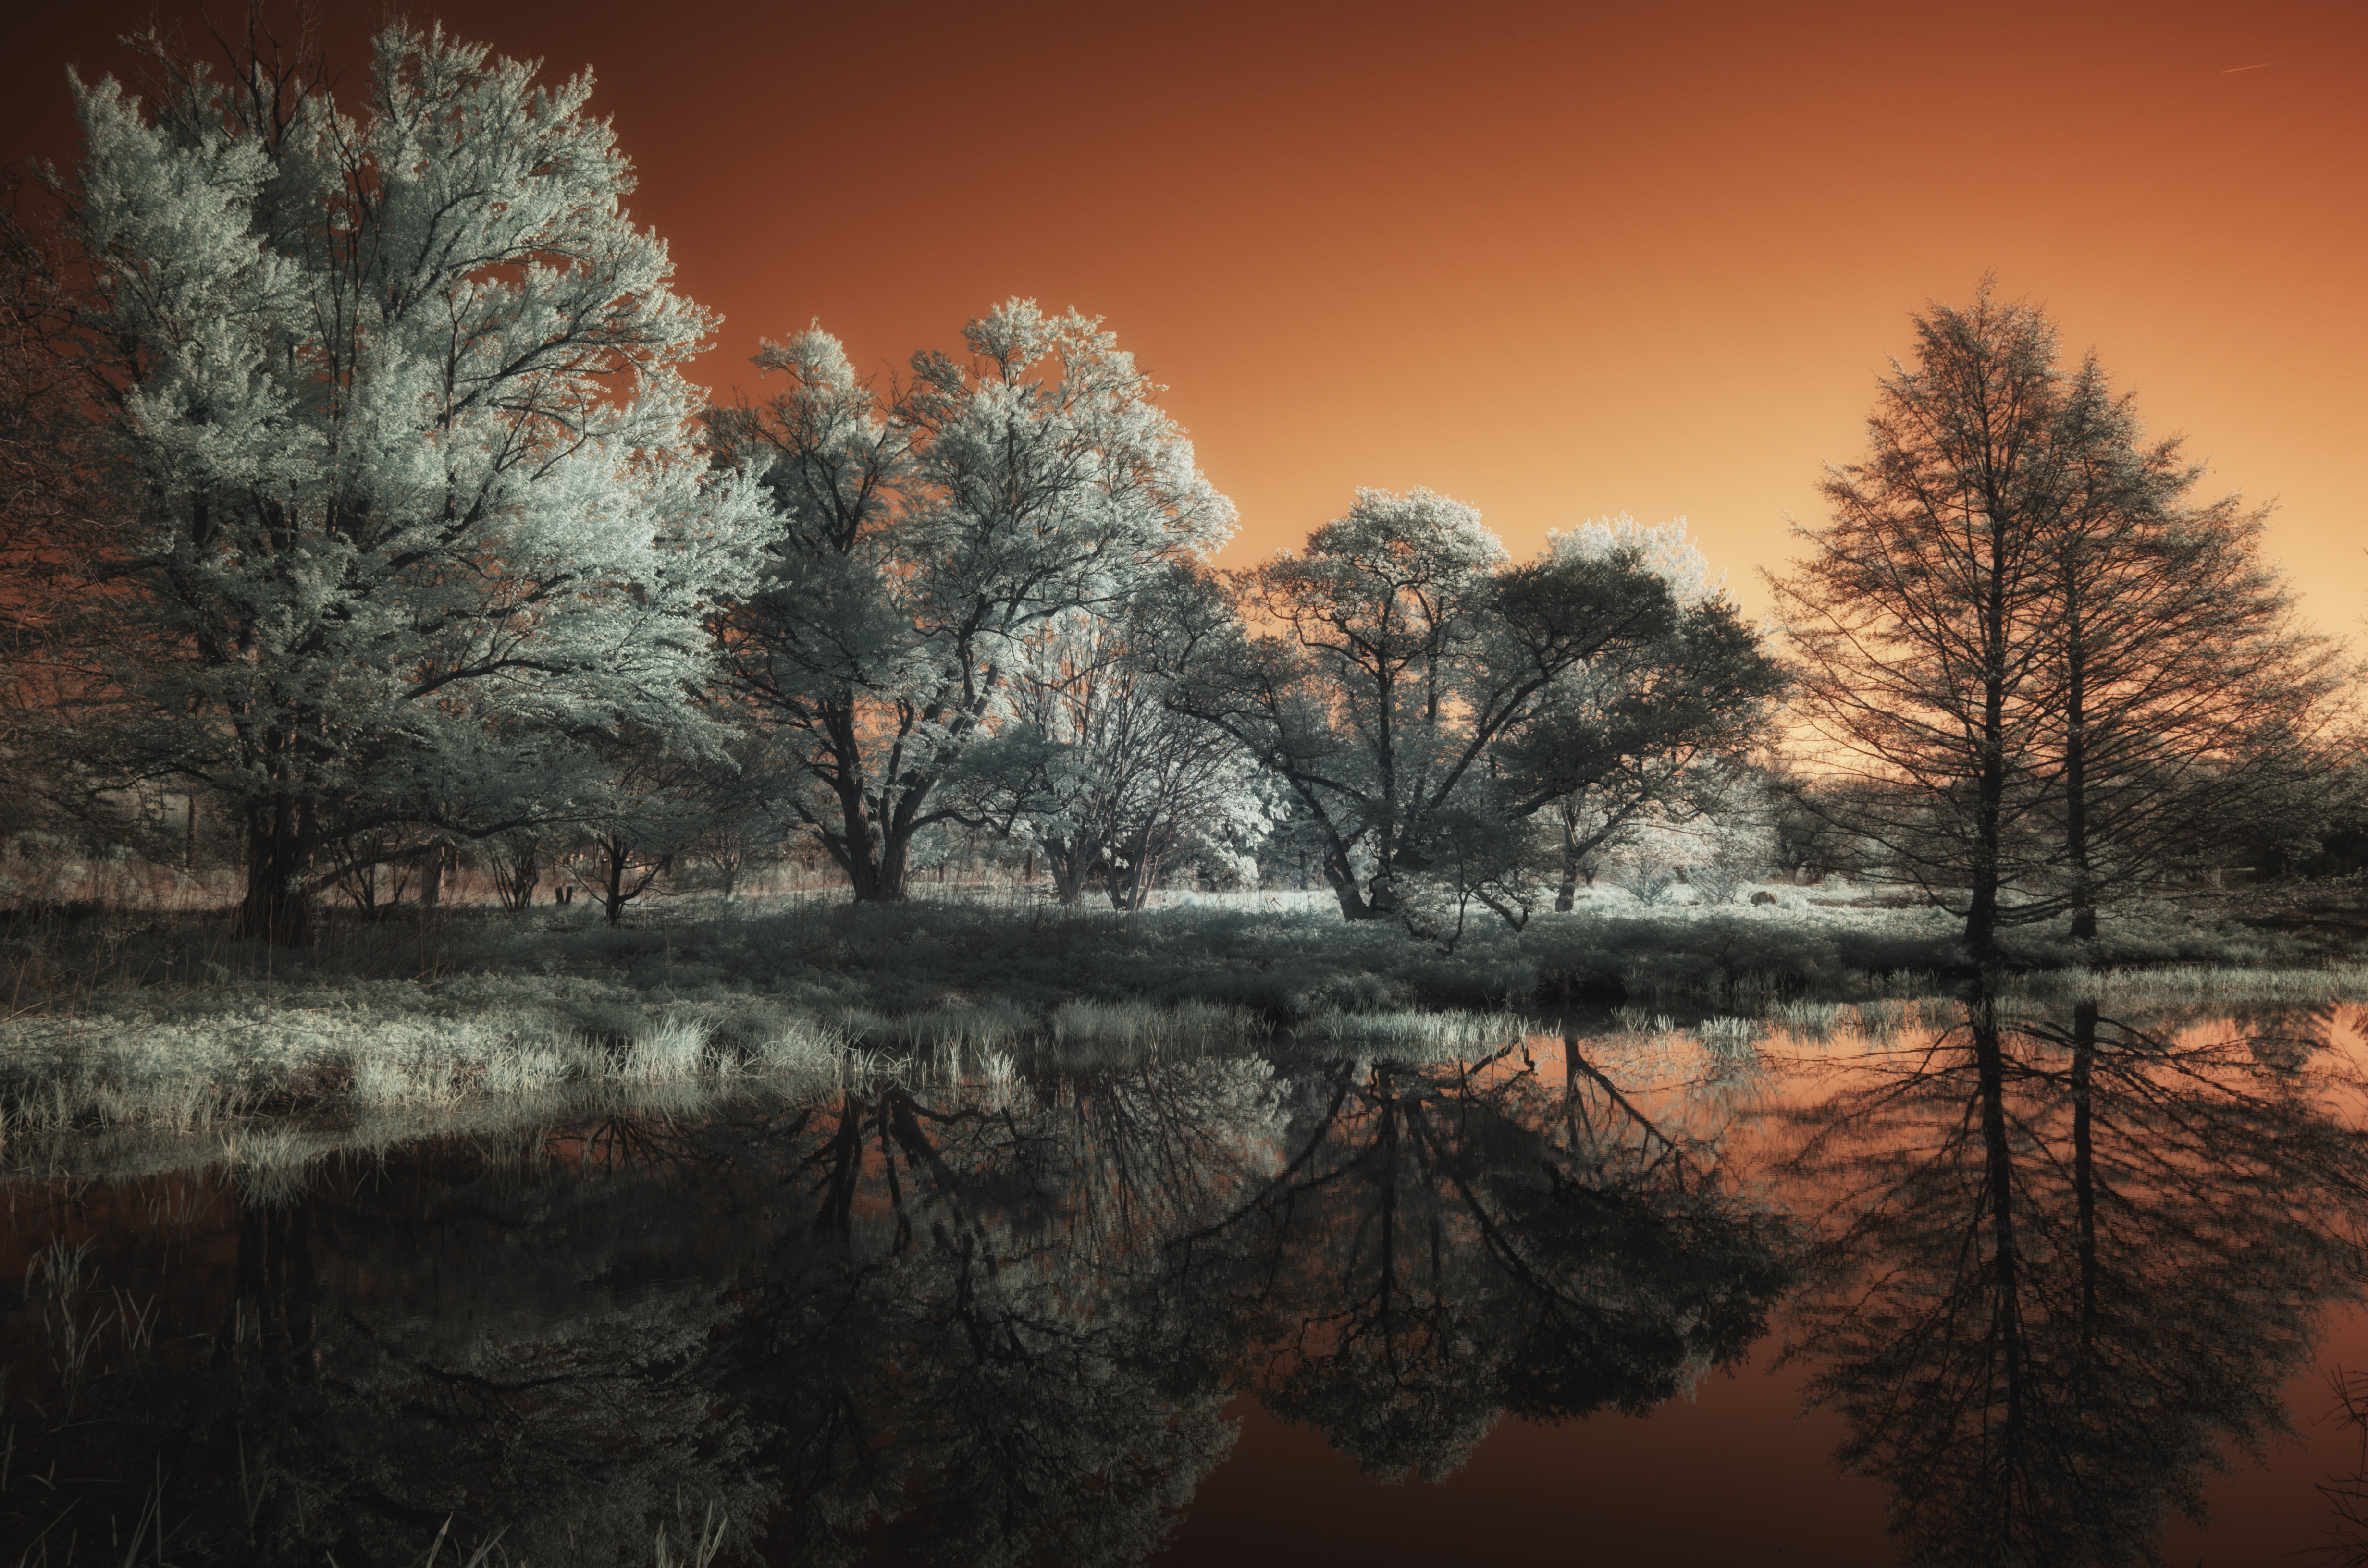
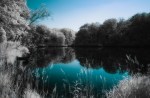
One of the best reflectors of IR light is chlorophylll, which is what makes the grass and foliage look green, the cornerstone of photosynthesis. By its design, chlorophyl is meant to receive sunlight, for the slew of chemical reactions to occur and for the plants to ingest CO2 and produce O2 + energy to live. And in IR light, we can see that and see it brightly! It still cracks me up to this day when I take a shot on a grass-laden meadow at midday sun on the hottest day of the year and the final image looks like Jack Frost just paid a visit.

Just as the above picture shows, the chlorophyll in the grass and tree foliage is an excellent reflector of IR light. Sky with low moisture content is a very poor reflector. Clouds reflect IR fairly well. This is why a typical IR shot from a hot summer may look like a mid-winter scene full of frost, because that is what our eyes usually associate white trees with.
Also notice how heavily contrasty the scene is. The dynamic range is pretty wide, midtones not as pronounced, but the gradient between the highlights and shadows is very stark. Far more pronounced than in regular photography. And this is the reason why shooting IR without good sunlight yields poor washed out images – there just isn’t enough data hitting the sensor to paint a striking scene and you end up with a flat grey image, no highlights, no blacks.
Quirk 3 – Colors
Alright, I’ll write a couple dedicated articles on this topic, because it is so huge, but here are a few observations. Since IR photography shoots light we cannot see, ALL colors are fake. We simply have to use software to move the information from the shot into something the camera understands and the human eye can see.
Ever wondered what a raw IR shot will look like straight from the camera? Here it is:
Now, it is not a bad image, contrast is good, decently sharp, looks clean, colors are odd but not offensive. It’s just a plain old IR shot from a 590nm filter. I will write a whole post dedicated to color later, but for now all you need to concern yourself with is the fact that color will HEAVILY depend on your choice of the IR filter. Just look at the infographic above and see where the IR starts and where the various wavelengths for visible colors are. If you look closely, you will notice that my 590nm filter sits on the edge of yellow band, so it passes through yellow, orange, red and IR and blocks greens, blues and purples and UV. This filter in particular should give you tobacco orange skies and teal colored foliage when properly white-balanced.
If you used a 720nm filter (the most famous one, like the Hoya R72), you’d be limiting your information to red + IR with the rest of visible light completely blocked. This filter would give you white foliage with nearly no color and your skies would be tobacco or orange.
And if you used an 850nm filter (similar to Wratten 85C) you’d be blocking all visible light and shooting pure near field IR. I do not have that filter, but can tell you that it’s picture would still come out of the camera as pinkish red or orange, not black and white.
Also notice one more thing from the above shot – it looks sterile, it looks surgically clean, it has no life to it. Which brings me to the last quirk today…
Quirk 4 – Halation
This is what makes or breaks an IR shot. I see oh so many gorgeous pictures on the Gram or Reddit with stunning colors, great compositions, great locations, yet many of them lack that IR “look”. The bright foliage is there, the psychedelic fake colors are there, high contrast is all there, but that famous bloom and radiance are not present. This is especially true for shots which were shot as JPEGs and processed in camera. The camera software was not designed to re-create the halo effect the IR film was famous for. Without it, the shots just look like oddly colored wonders of art created by someone who took one too many acid trips. The radiant bloom is where the money pot is buried and too many photographers just pass on that opportunity.
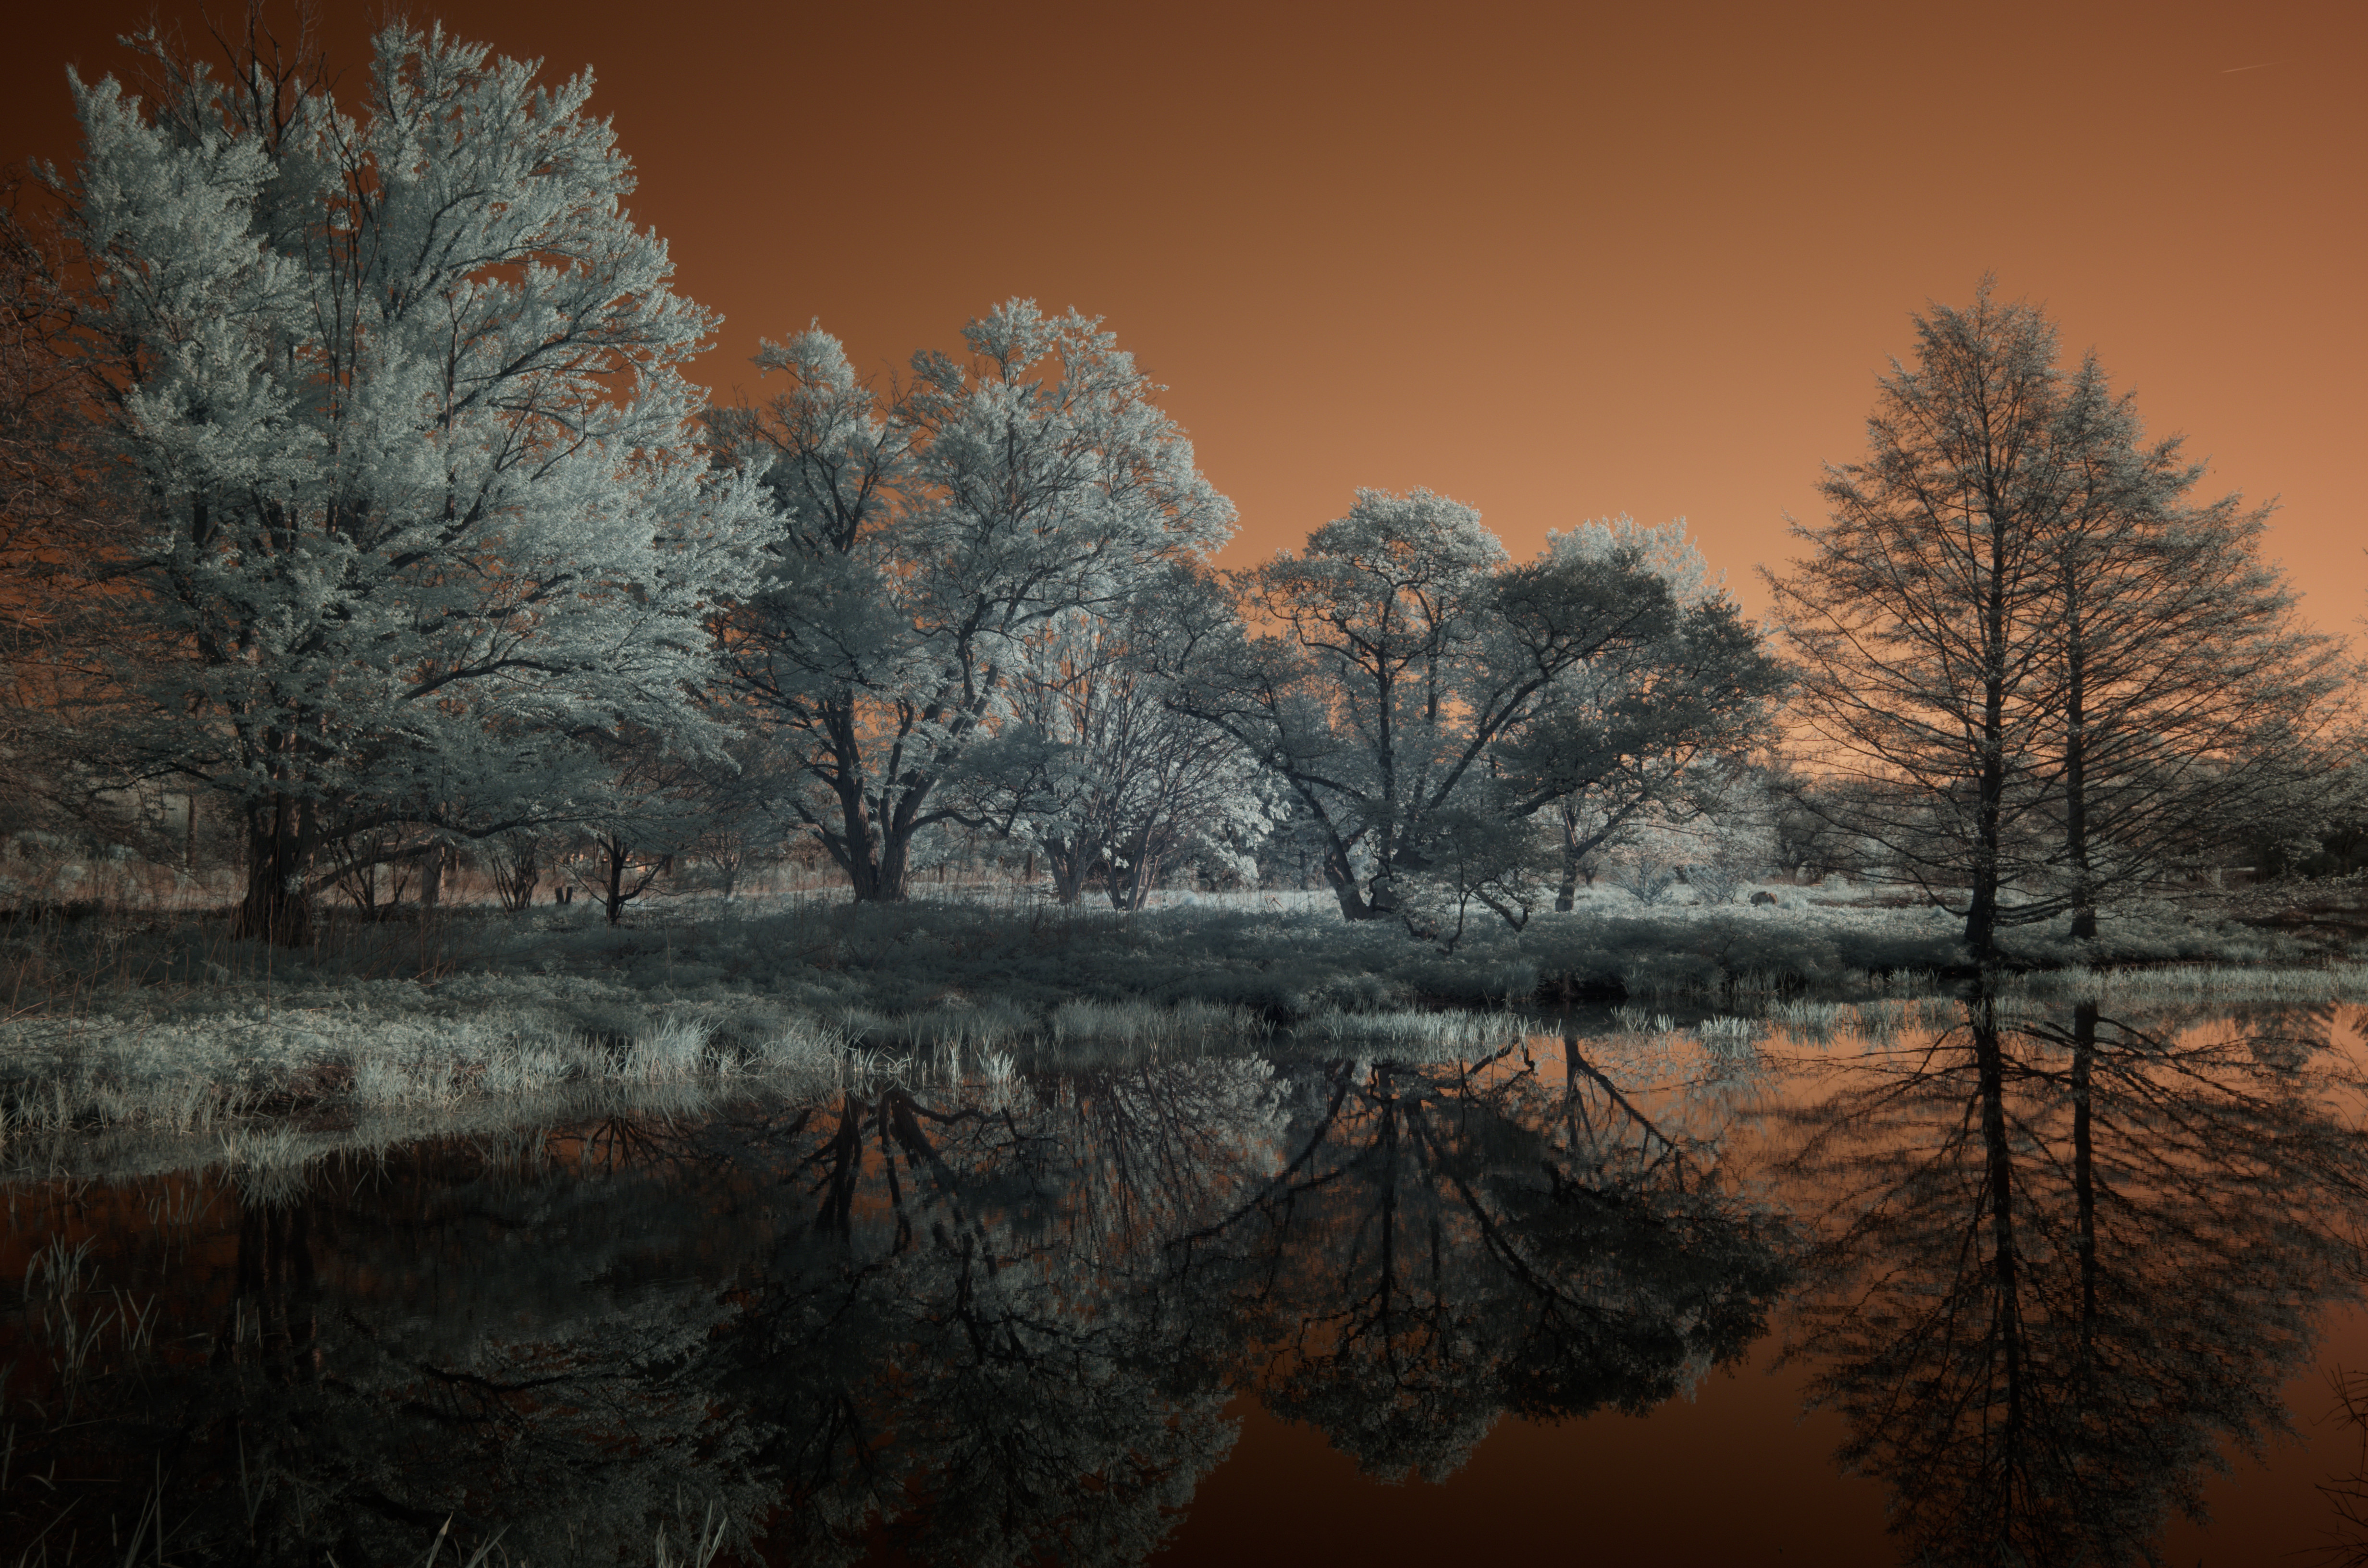
Just look at the below picture and compare it to the raw one above.
You can clearly see the difference – you may not be able to put your finger on it right away, but the two color pictures clearly differ in their feel. The latter being way more dreamy, more contrasty. More whimsical.
That is the radiant halo around the tree canopies stretching half way into the sky. I processed this in Nik Color Efex 6 and the filters used here were Sunlight, Pro Contrast, Low Key, Glamour Glow. I’ll write a whole blog post on exact steps and will publish a LUT for PhotoLab you can use.
Lastly, I wanted to mention monochrome, because that is where my heart truly is. I think IR lends itself to beautiful B&W shots because of its propensity to have high contrast.
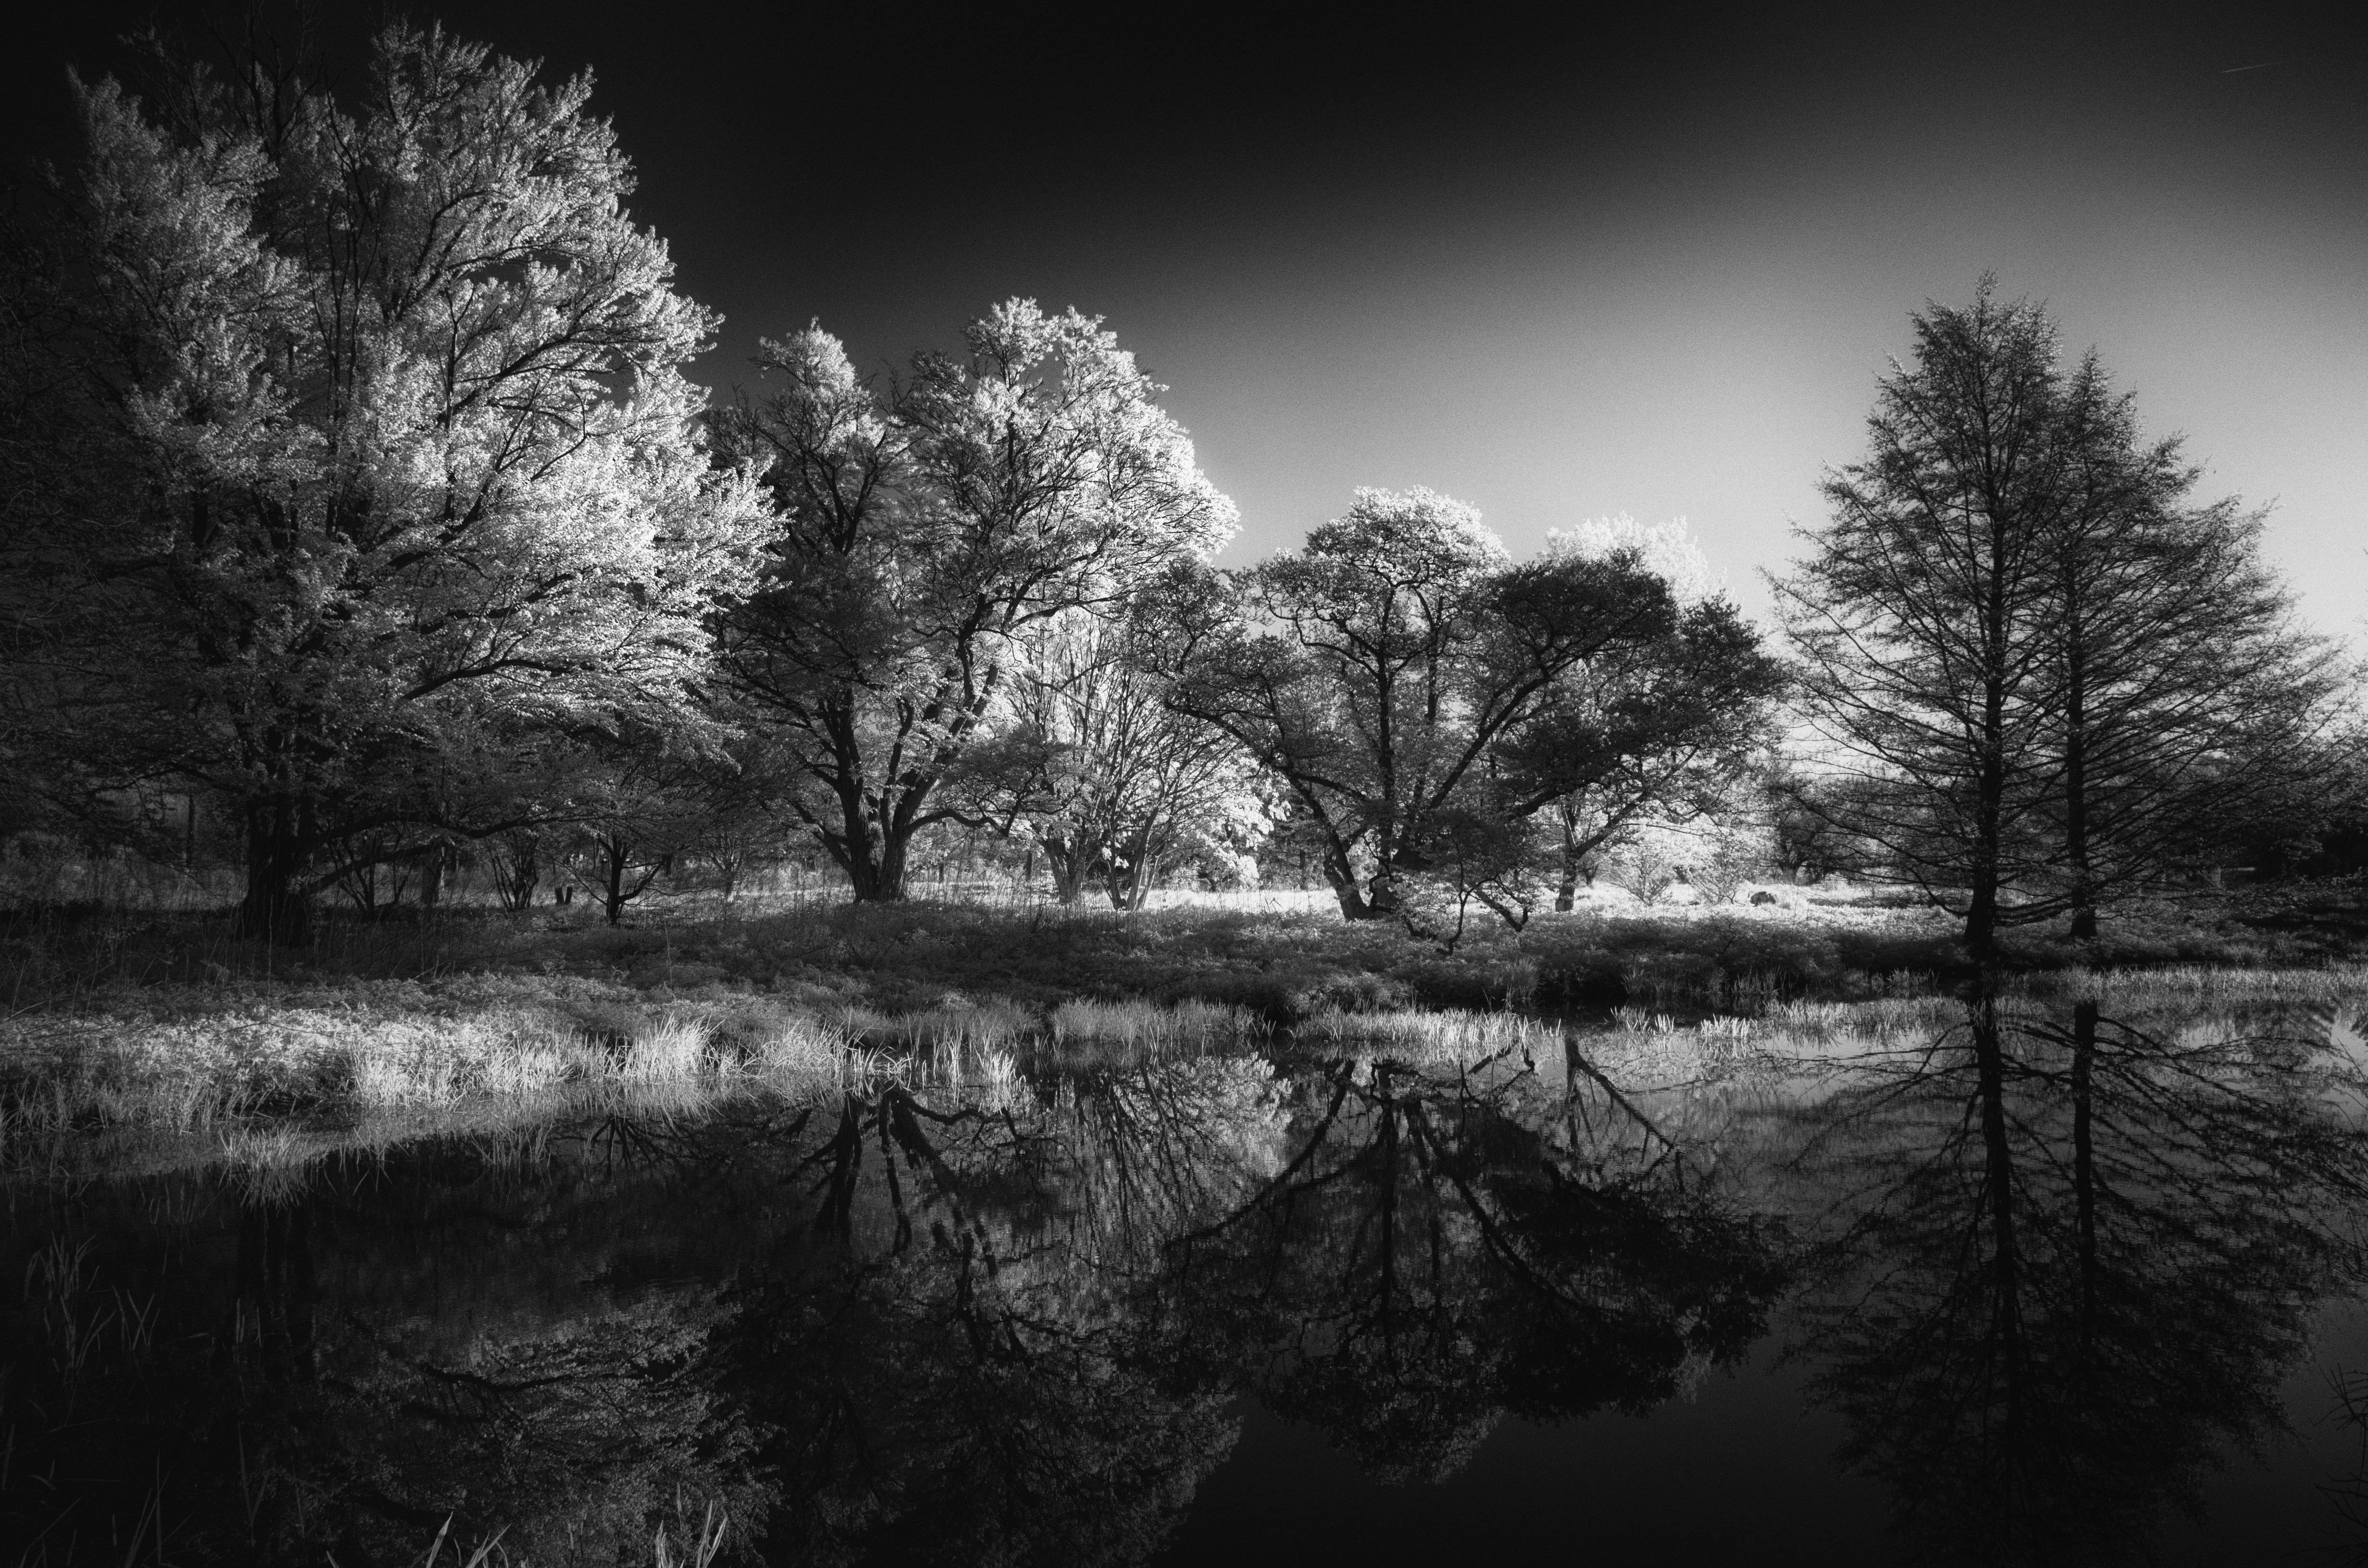
When I make B&W photos I always run them through Color Efex to create that dreamy eerie look and then take them into Silver Efex to do the conversion.
This is not a single button conversion to just move the saturation slider all the way to the left and be done. Nope. This is an ordeal which varies from photo to photo. There are a few presets in Silver Efex I really like, but I also nearly always tweak them. I play with the HSL wheel and luminance and do the monochrome conversion specific to each color. For instance, if I want to have a very dark sky, I choose the orange and red channels and selectively darken them – the skies become pitch black while the rest of the image tonality remains the same. I will have a post on B&W conversion where I will talk at length about the benefits of using a 590nm filter vs 720 or 850 filter, because more color means more freedom to explore.
Closing thoughts?
Well, I already have several draft posts in the works and now is the time to finish and publish them, because I absolutely love IR and hope that some of this information could help you either to find a solution to your struggles (if you are already shooting IR), or help you make the leap into IR and rekindle your love of photography.
IR is addictive…
What I have in the works are these articles:
IR Photography – The Basics (published)
IR Photography – Filters vs Conversions
IR Photography – Focus & White Balance
IR Photography – Which Software?
IR Photography – Post Processing Color
IR Photography – Post Processing B&W
IR Photography – Channel Swapping
As they say, when you hit a creator’s block or are stuck in a rut, try something new, for that is how you grow. There is a cheap way to get into IR and the creative benefits may blow your mind, if you decide to take the red pill…
More soon…


Leave a comment